Friday, March 14, 2014

Stepper Motor Interface PIC18F4550 Microcontroller

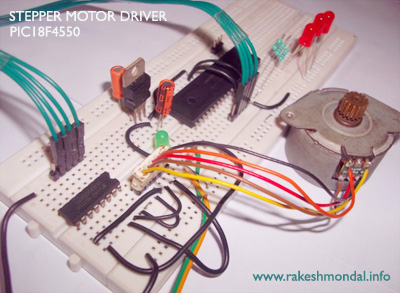
Stepper Motor Driver using PIC18F4550

This is a simple project for running a unipolar Stepper Motor using a PIC18F microcontroller. The Microcontroller is coded to run the stepper motor in three different stepping modes. The Stepper motor is interfaced with pic18f4550 using a ULN2003 chip. The Stepper motor is running in 9 volts, But pic18f4550 cannot draw 9 volts hence a uln2003 is used. 

Stepper motor Interface to PIC18F4550


The Microcontroller cycles three modes of stepper motor stepping such as Single, Half wave stepping and Full wave stepping with a delay of 2-3 seconds of delay in between. The Stepper motor Drive is coded with mplab x ide and XC8 Compiler.


Stepper Motor Source code

The Stepper Motor coils are connected to PIC18F4550 pins, RD4, RD5, RD6 and RD7, and then these pins are interfaced with ULN2003.

Stepper Motor Schematic PIC18F4550

According two the two source code posted here, two schematic is posted. The power source is common for both ULN2003 and pic18F4550 hence an IC 7805 to maintain input constant at 5 V.

Stepper Motor Project

Download and install mplab x ide along with XC8 Compiler (Either windows and Linux) and then download the project from the link below.
Run the project and burn the firmware into the microcontroller using your favorable microcontroller programmer such as JDM programmer or PICKIT2 programmer.


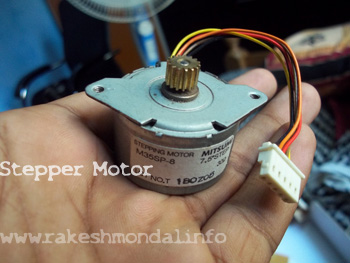
Testing the Stepper Motor

This is a basic mechanism to test weather the stepper Motor is working. It is a basic test to see if each of the pins are working. The Motor used here is an old unipolar Stepper motor.


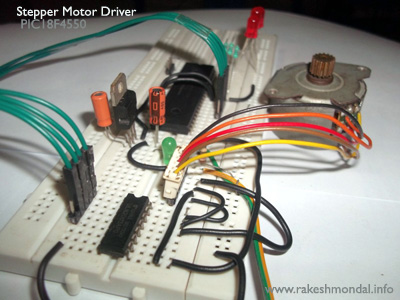
Testing the Stepper Pulse 

After burning the stepper motor with the source code, Before interfacing the Microcontroller to the PIC18F4550, to test - few LED’s are connected across the Microcontroller pins, just to make sure if the pulses are getting generated the way as it is supposed to be for the stepper motor. After successful testing the Stepper Motor will be interfaced with the microcontroller via ULN2003.


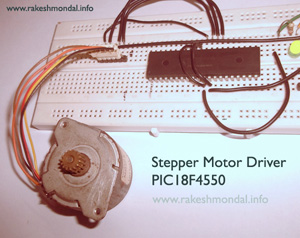
After successfully testing the stepper motor pulse generated by the microcontroller , connect the stepper Motor across the microcontroller through the uln2003 IC.

Please refer my next tutorial for running a stepper motor using a computer via USB communication.

Thanks for Watching


Related post

USB STEPPER MOTOR DRIVER
Collection of Stepper Motor Tutorials and Projects


Tuesday, March 11, 2014

LOW RPM High Torque DC Motor Interface to PIC18F4550 | Robotics

This video is a demonstration of a LOW RPM High Torque DC motor interfaced with a PIC18F4550 microcontroller through a L293D Motor Driver circuit for a small tutorial robot. The pulses generated on the microcontroller pins are interfaced to the L293D which is guiding the Motor to run in Clockwise, Anti clockwise or Halt.

The low rpm and high torque of this dc motor makes it perfect for robotic applications. To increase the torque at the wheels, sometimes additional gears are necessary, but this specific high torque dc motor comes with an in built gear mechanism, providing necessary torque. This video shows a demonstration of the DC motors working before the entire circuitry was installed on a 4 wheel differential drive robot


The motor is operating on 12 Volts which is managed by the L293D, however the power to the microcontroller is being provided by same power source with a IC 7805 voltage regulator to keep input voltage to microcontroller strictly at 5 Volts.


The microcontroller is coded with Mplab X IDE and XC8 Compiler.

Thanks for watching

Ron